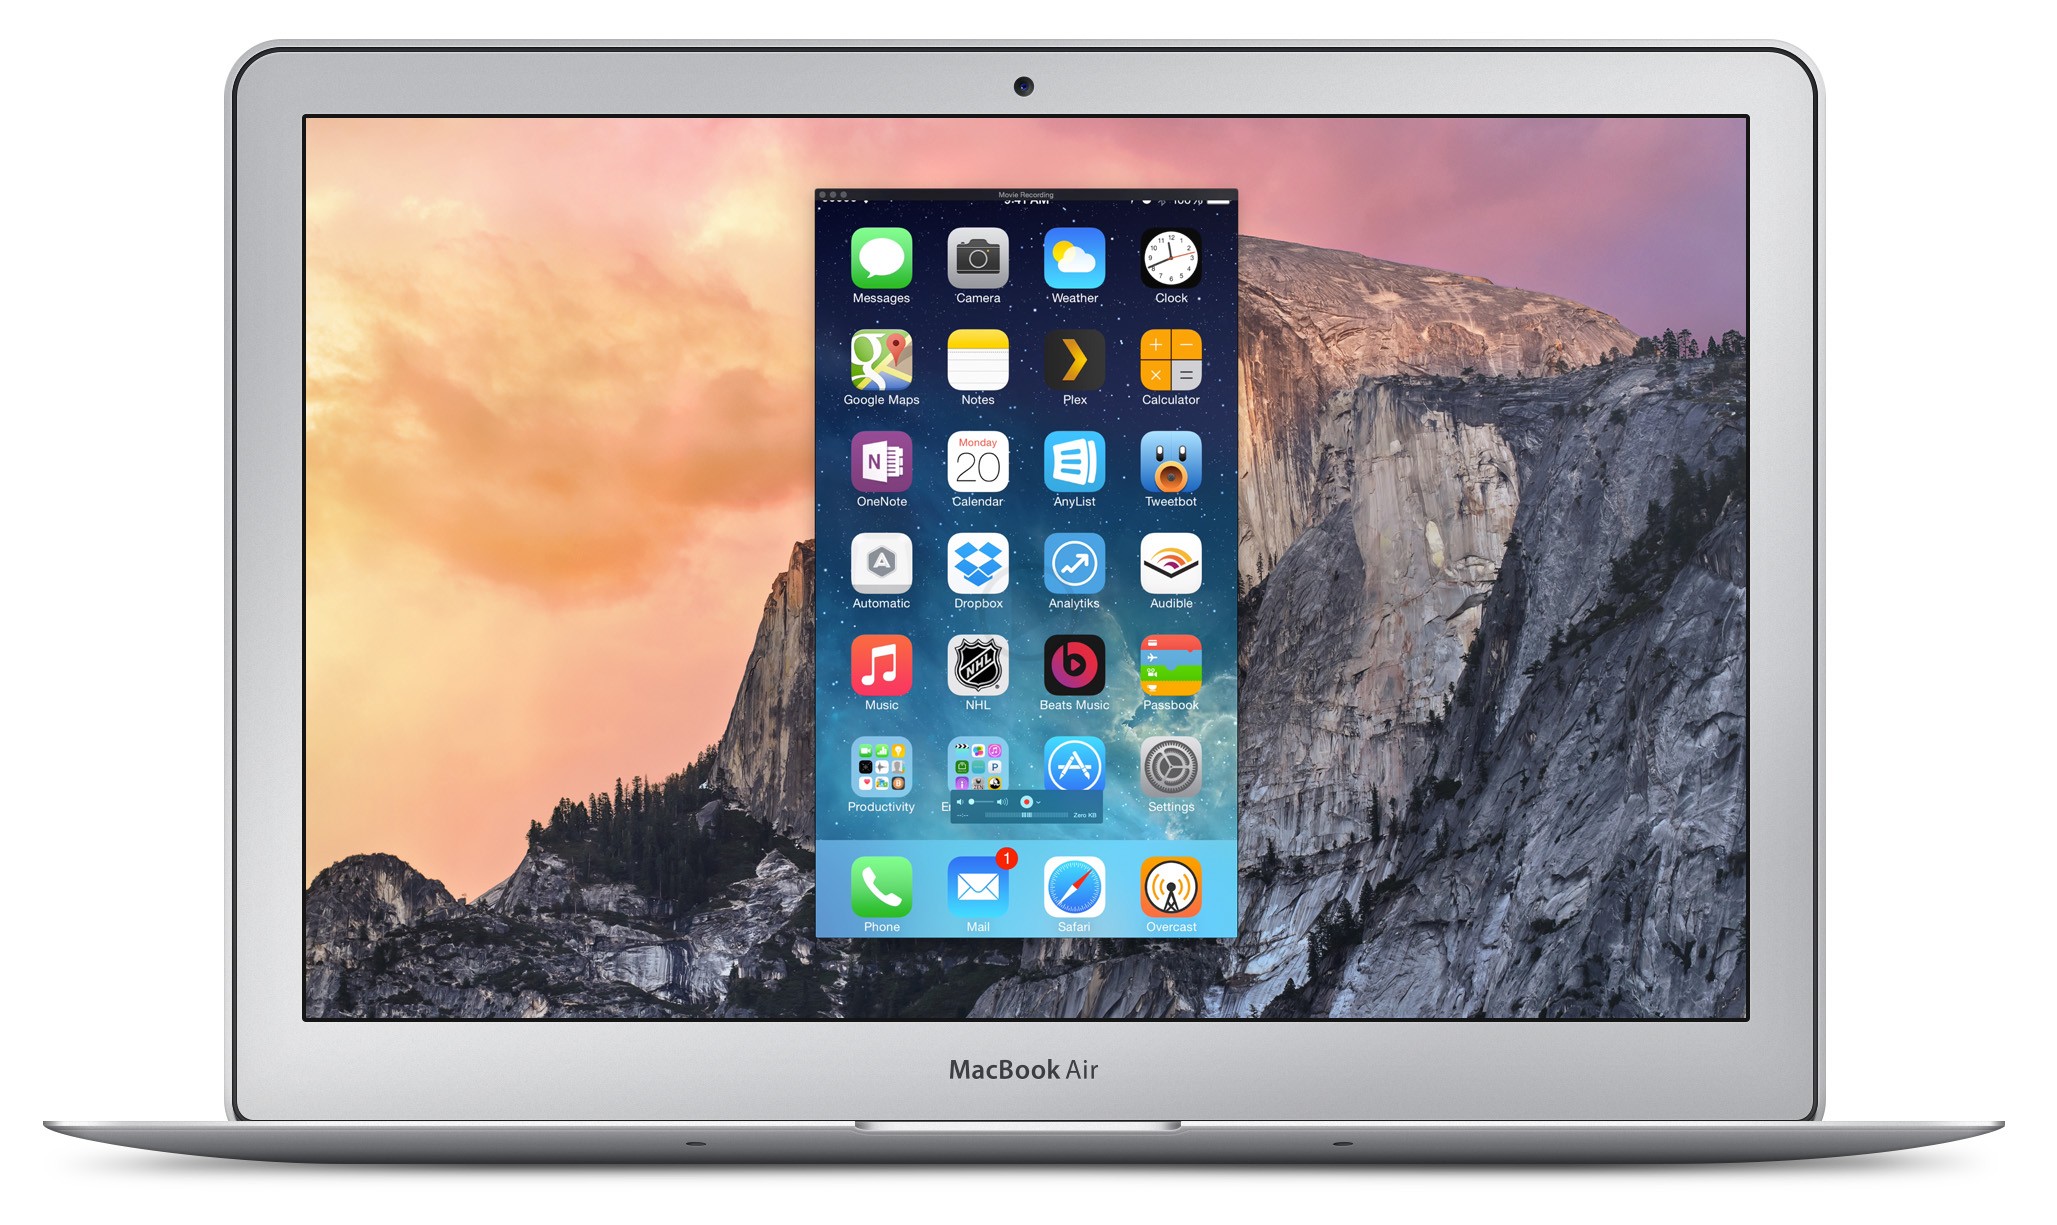
For a long time now, the facility which allows iPad and iPhone users to record their device screens has been available. On the other hand, the facilities were not only lengthy, but also involved a lot of steps. Moreover, one could only accomplish the work by using a jailbreak app or a special iOS app called AirPlay. Recently, with the availability of iOS 8 and also OS X Yosemite, the whole process of recording the videos from an iPad or an iPhone has been made much simpler and easier. The only software one needs is QuickTime.
The very first thing to keep in mind if one wants to make screen videos of their iPhones and iPads easily, is to use iOS 8 or OS X Yosemite. Next, one needs to connect their iPad or iPhone to their Macbook using the Lightning type connector. Another minute detail that the user needs to keep in mind is that the Macbook the user is using must be in the “Trust” list for the iPhone of the iPad to work.
After connection, the following steps need to be completed:
a) QuickTime player must be launched in order to use on. There, in the File drop down menu, one needs to select the option, ‘New Movie Recording’. As an alternative to reaching this option using the mouse, one can also use a keyboard shortcut by pressing Option + Command + N.
b) On completion of the previous step, QuickTime will immediately switch on the Macs built in camera, iSight. This is the default setting of the software on the Mac Book.
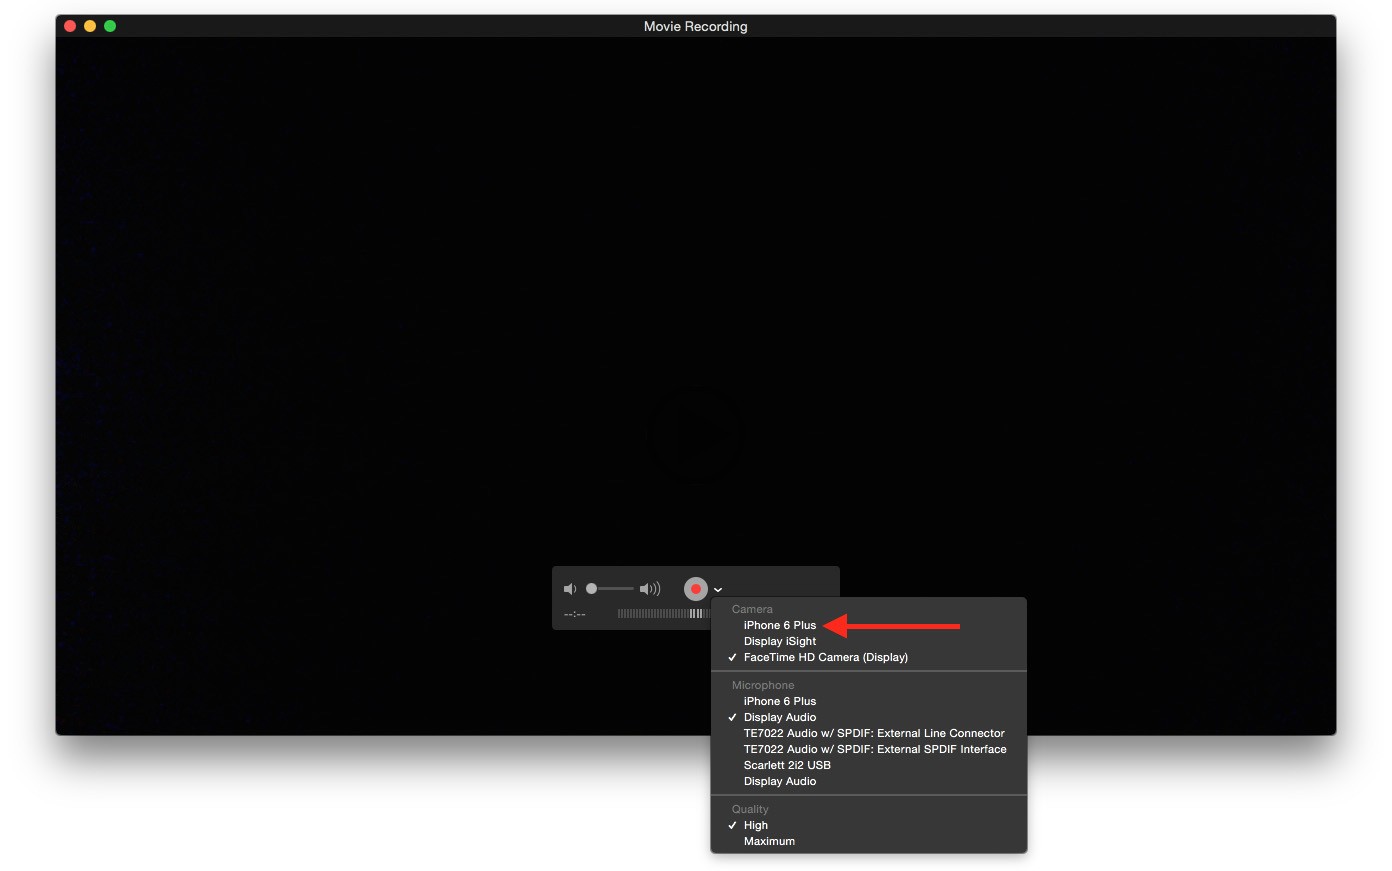
c) On closely inspecting the surroundings of the record button which appears on the screen, one will find a small downward facing arrow. Clicking this arrow will produce a drop down menu from which one can select their iPad or iPhone to work as an alternate source for recording.

